Working with bricks and creating a wall are some of the basic skills of home improvement. There are different reasons for homeowners to DIY bricklaying project, especially if the scope of the task is quite small. This should allow us to learn one of the most valuable skills and in fact, bricklaying can become a hobby. Before we start a bricklaying project, it is important to gather ideas and envision end results. We should be aware that masonry is a more permanent part of our property and it is meant to last for many years. That’s the reason why we should do this carefully.
There are factors that we need to consider such as appearance, drainage, materials selection, location, scale and size. Homeowners should have detailed drawing about the project, so they can eliminate any flaw in the design. We could visit hardware store or home improvement centers to look for samples of material that we should use. This will help us to determine the quality of the masonry and whether we could cut down on the overall costs. Other than supply of bricklaying material, we should also find all the necessary tools for this task. There are different tools that we can use, as an example, mortar hawk is useful for holding mortar.
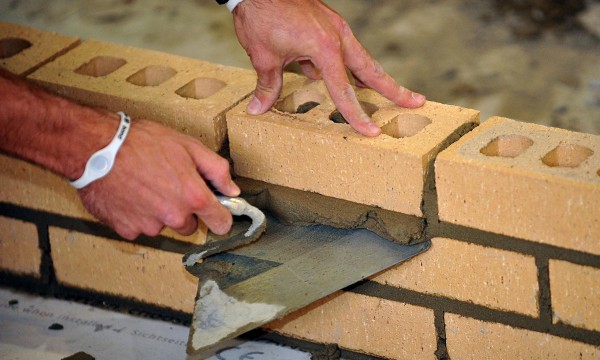
For placing mortar on brick, we need a wide pointing tool and narrow tuck pointer. Jointers are useful for finishing joints. Mason’s trowel is for applying mortar and brick tongs for carrying bricks. Stakes can be driven with a mail, bricks are chipped with mason’s hammer, split with masonry chisel, dry mortar is removed with joint chisel and the working are should be kept clean with broom. Stiff bristle brush can be sued to remove loose material, pipe claw to score many bricks, circular saw to cut brick and wheel barrow to mix mortar. Lastly, we need appropriate safety equipments, such as protective eyewear, gloves and particle mask.
A good masonry mortar should be consisted of sand, Portland cement and water with proper composition. We could add gypsum and lime to control setup time and improve workability. To speed up the process, we could purchase premixed mortar and we only need to add some water. There are different types of pre-mixed mortars in the market. Type N is known for balanced durability and strength. It is useful for chimneys, BBQ grills and freestanding walls. Type S is for high-strength mixture, such as patio, walkways, driveways and foundation. Type M is essentially for very high strength solution, which can be used for load-bearing walls.
In this case, it is very easy to make a premixed mortar and we should add enough water to get an ideal consistency. If we add too much water, it will be weak and messy, but if it is too thick; we won’t be able to get smoother results. Mortar should be mixed in smaller batches and it is important to use them all.